A colleague sent me this study plan, and I was so excited to dive in!
Here’s Katie’s intro to her plan:
There are many ways to learn. While some people prefer to have a live instructor in a course, others are great at doing self-study. I teach SANS FOR578: Cyber Threat Intelligence, which is a great course if you want to learn about cyber threat intelligence (CTI), but I realize not everyone can afford it.
Here’s the good news: if you are committed, you can learn a lot of the same concepts that paid courses teach, but on your own. It won’t be the same, but you can still learn a ton if this learning style works for you. I wanted to share a self-study plan to help out anyone who wants to take the initiative to learn about CTI. There are lots of great resources out there, but I realize as you’re starting out that someone saying “go look at all the things!” isn’t that helpful because you’re not sure where to look. My goal is to bring together free resources I’d recommend studying and provide a minimal framework and question to help tackle them.
optional paid resources that can supplement the free learning that just took place!
This plan is very thorough and will take quite a while! My plan is to take it step-by-step and work my way through from beginning to end. I created a study notebook, and it’s already filling up with the nuggets I’m learning.
I considered publishing my study notebook here, either as I go through each resource or at the end, but quickly thought better of it. There’s a lot of value in going through the resources and I don’t want to take that opportunity away from anyone! I will, however, post updates on how my study is going and post any extra helpful nuggets I learn along the way.
Today I started reading Psychology of Intelligence Analysis by Richards Heuer, and it’s fascinating!
If you’re interested in Cyber Threat Intelligence, this study plan is a great resource that I’d definitely recommend!
“Easy!” you may think. Nope, not easy! There are two factors at play here. One is time, and the other is the amount of content covered. The GSEC exam is 180 questions with a 5 hour time limit. That’s roughly a minute and a half per question. After reading the question and answer choices, that doesn’t leave a lot of time to choose or find your answer! There is so much content in the books that finding the answers in the books is not easy. This is where a good index comes in! But if you look up every question, you will run out of time, so you really do have to know the information well even though it’s open book.
The GSEC just got a facelift, and I think I was part of the last group that had the old version of this exam.
The books I have are dated 2020. If your books are dated after 2020 then you probably have the newer version of the exam, in which case your prep might be a little different. That said, I think I would have prepared pretty much the same way for the updated exam. The main difference I’ve heard is there may be some hands on (performance-based) questions on the new exam while the one I took was all multiple-choice.
There are already so many great posts out there describing how to create an index and prepare for the exam. Here are a couple of my favorites:
Have I mentioned the family motto of the family I grew up in? My brother-in-law pointed it out and it is so true it’s scary. “If it’s worth doing, it’s worth overdoing.” To which my mom replied, “If it’s worth doing, it’s worth doing right.” Haha so my family tends to go a little over the top! That may or may not apply to my index…
After I finished the week-long SANS SEC401 course, it was time to study. I started by reading all of the books cover to cover, with an excel spreadsheet open as I went that would eventually become my index.
Index Creation
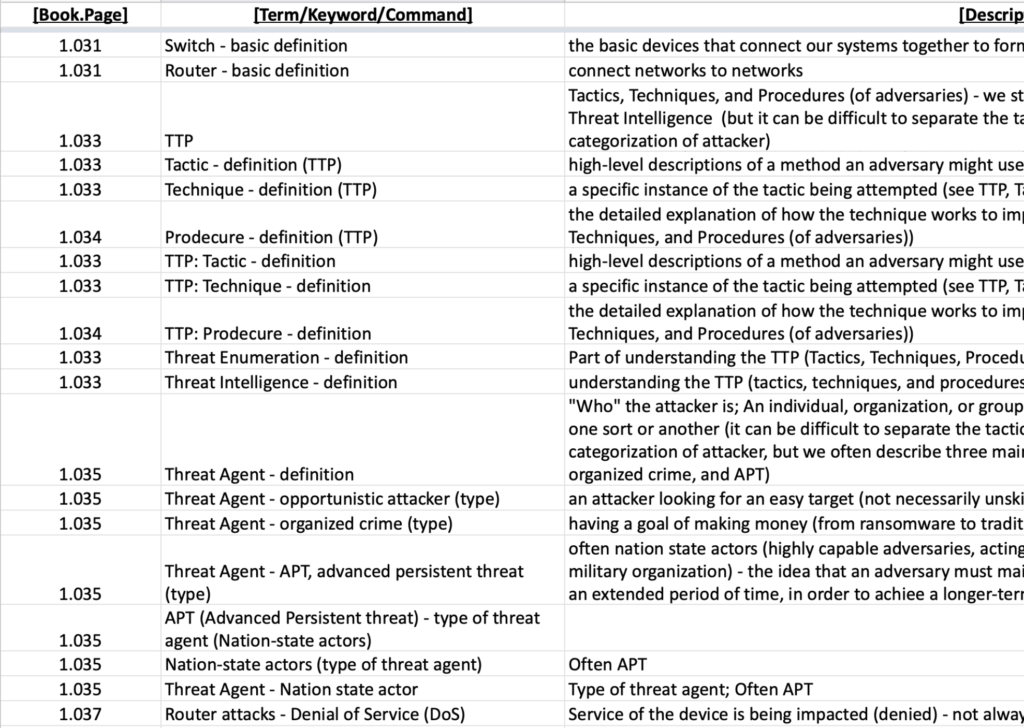
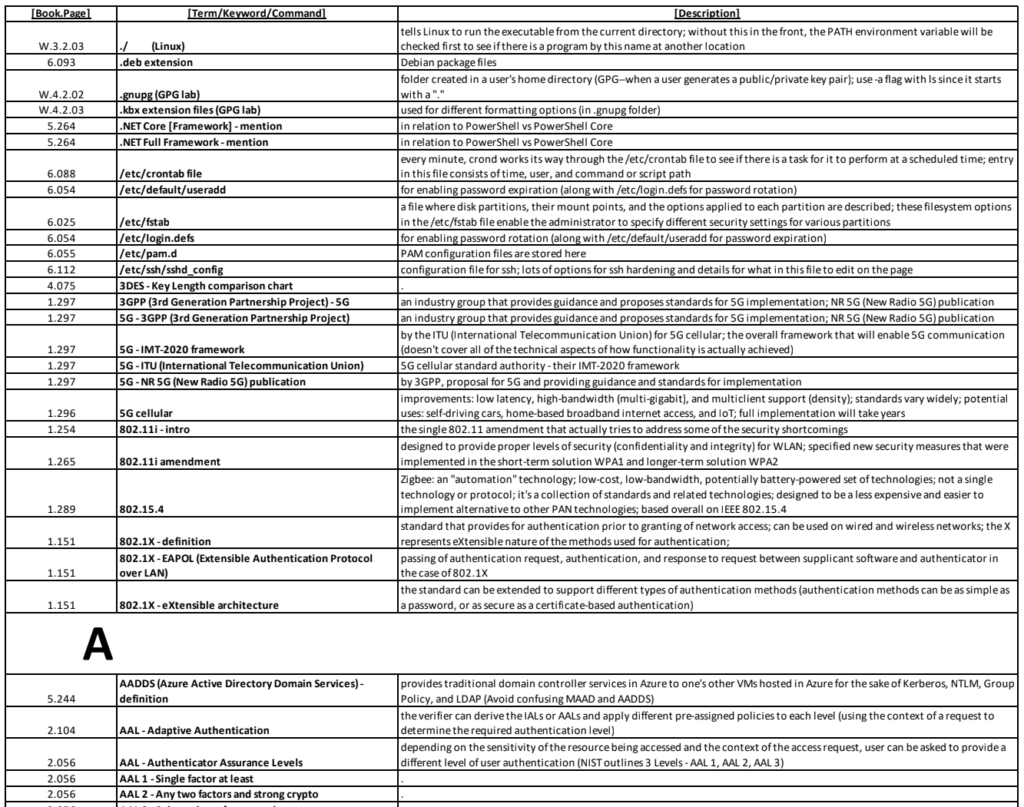
The excel file for my index started out very simple. Three columns:
Book.Page – I chose to have this info in one column, but you could easily do a column for the book and a column for the page.
Term/Keyword/Command – This is where I may have gone a little overkill (see family motto above!). Instead of one entry for each topic, I thought of all the ways I might want to look it up and made a separate entry for each. Since I knew I’d be sorting the index alphabetically, I wanted as many options as possible to find the details I was looking for.
For example, under Threat Agent they talked about Nation State Actors, so I added one entry for “Threat Agent – Nation State Actor” and another entry for “Nation State Actor (type of Threat Agent).” You get the idea. There were a few things I had more than two entries, when I saw more than two ways I might be looking for the same content. It didn’t take much extra time, as I copied and pasted the page and description, and I felt like it was useful come exam time.
Description – some people leave this out, but I wanted details in the index so in this column I added the related definition or description.
Book Prep
When I started each book, I prepped the book first:
Since the books all look so similar, I used a sharpie to write the book number on the front cover, and that ended up really helping as I was moving from book to book during the exam.
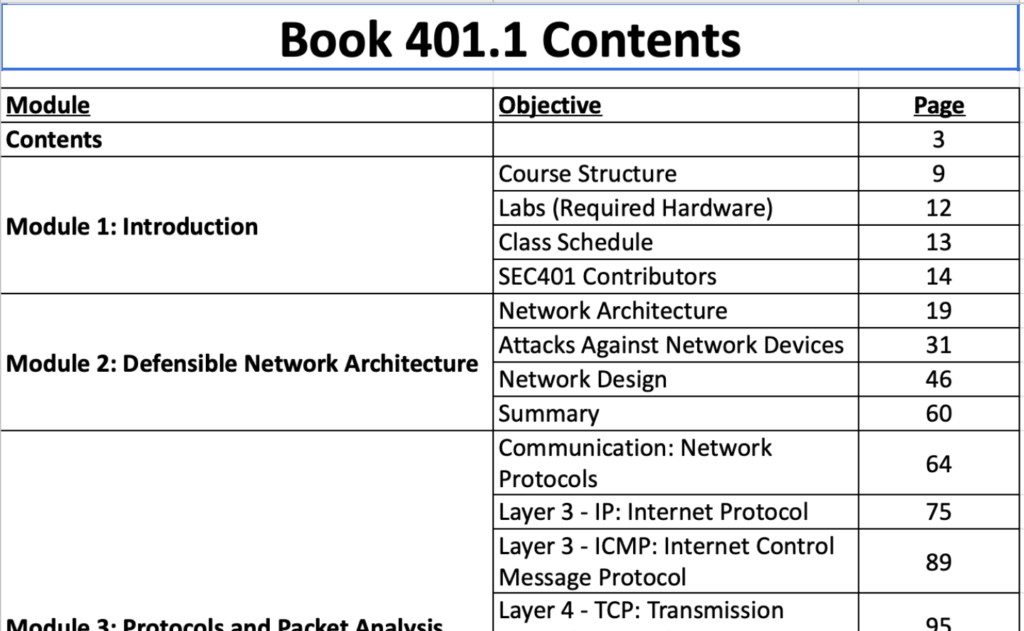
I flipped through the book and made a Table of Contents (TOC), noting each section and the page number it started on. I don’t know why these books don’t already have a TOC, but that stuck out to me during the course so I knew I wanted one to reference. In the end, I printed the TOC and appended it to the back of my Index. Here’s an example of what my TOC looked like:
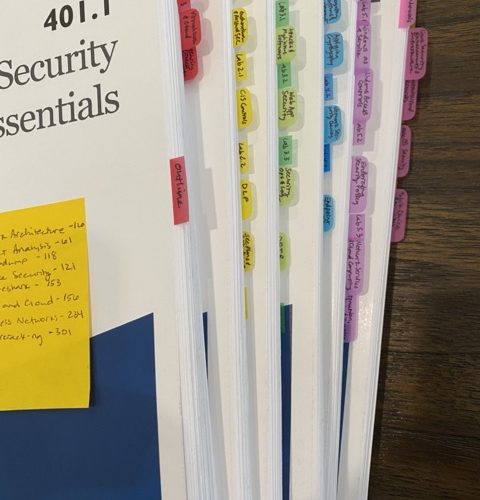
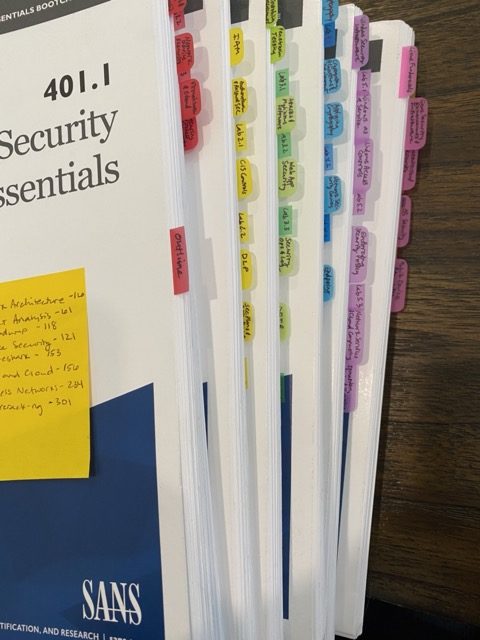
I also wrote the Modules and their starting page number on a sticky note to put on the front of the book as a quick reference.
Finally, I used little post-it tabs and an extra-fine point sharpie to create tabs for each module in the index.
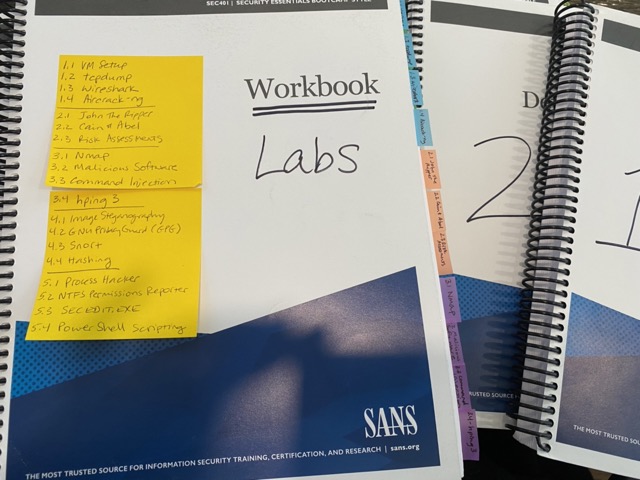
I marked each Lab’s start page in the Workbook with a sticky note as well!
So Much Reading
Then I started reading. As I read, I highlighted important terms or definitions/concepts on the pages and added any terms or info I felt might be notable to my index.
Example of index entries:
As I mentioned above, I duplicated entries with every different way I thought of that I might want to look up each topic. I also put everything that seemed notable in the index, so it ended up being so long! More on that later…
As I went through each book, every time I came to a lab I went to the lab workbook and worked through that lab. I also highlighted and indexed the lab workbook, and I’m glad I did because I definitely used it during the exam!
It took me about the equivalent of a full day to work through each book—a little more for the longer books. The instructor suggested one week for each book after the course, then another week for practice exams, and I think that was great advice on the timing.
Index
Once I’d gone through all the books, it was time to format my index.
First I ran a spell check—lots of typos when I was typing quickly! Then I alphabetized by topic and added a row before each new letter to mark the transition.
Then I did a print preview and it was SO many pages! I didn’t want to pay too much for the printing, so I adjusted the font size etc until I felt like it was manageable for my eyes but also made the most of each page.
I also printed out the SANS cheat-sheets that were included in the course, as well as all the book TOCs, to add to the back of the Index.
Pretty much all of the posts I read about creating a SANS index recommended using the index for a practice test before finalizing it, so I printed my Index to PDF so I could use it for a practice exam.
Practice Exams
I felt like the practice exams were so helpful in preparing for the actual exam!
Since it’s a long exam, make sure to block out the full 5 hours for the practice exam. I would recommend replicating the exam environment as much as possible. There are 15 minutes of break time built in to the exam, so you can use the restroom or grab a drink of water, but you do have to finish any questions you skipped before you can start the break. If you skip quite a few questions to come back to later, keep that extra time in mind as you plan your breaks!
I kept a little notepad nearby as I took the practice exams, and made a note of two things.
How many questions I looked up—I just made a tic mark for each question I looked up, and at the end I could assess what ratio of the questions I looked up vs just answering on my own. I thought knowing this in relation to how long it took me to take the practice exam would help me with timing on the actual exam.
Any topics I didn’t feel confident in—I made a note of the topic of each question I had to look up, and any question I answered on my own that I wasn’t 100% sure I had the right answer.
After the practice exam, I used this info to review the material and revise my index.
At this point, you have a choice. Take the second practice test, or go straight for the actual exam. My goal was to score over a 90% on the exam, so I opted to use the second practice test. (If you don’t use it, please consider gifting it to someone who is prepping for the same exam!)
Final Index (aka Your SANS Masterpiece)
After the second practice exam, I finalized and printed my Index. I printed mine on my home printer then assembled it as follows:
A simple cover page
Printed Index (this ended up being 80 pages, and I printed it front and back so it used 40 pieces of paper)
SANS handouts from the course as well as a few other relevant SANS cheatsheets I found on their web site
The course book TOCs that I made
Once it was assembled, I took it to Office Depot and paid about $5 to have it spiral bound with a clear cover. Then I used more post-it tabs to mark where each letter of the alphabet started, and the handouts and TOCs. Isn’t it beautiful?!
I may be a little biased because of all the time and brainpower that went into its creation! 😉
The Exam
My SANS class was in May. I originally scheduled my exam for the first week of July, but when I only had a week until the exam I pushed it back one more week because I wanted a little more time. I was so nervous that my prep wouldn’t be good enough!
I ended up taking it the second week of July, and the day before my family left on a 3-week road trip across the country. (100% would not recommend, packing last minute to drive from Texas to California with stops in Utah, Washington state, and Oregon was a tiny bit stressful! Did I mention I have 6 kids? I’m sure I could create a whole nother post with details on the logistics of road trip prep if this were a different kind of blog!)
Anyway, the testing center was great and it went as smoothly as it could be. I did take almost the full 5 hours, and ended up looking up about 1/3 of the answers, but I scored a 94% and couldn’t be happier with that outcome!
I was really glad I had such a thorough index, and I feel like the detail I put into it helped really internalize the concepts in the course—which is the point of the whole exercise, right? I ended up referencing some part of everything I included in my index—the SANS handouts, info I’d indexed from the labs, etc—during the exam.
Have you taken a GIAC exam? What would you recommend or not recommend from your prep experiences?
I feel a little weird about it because these classes are not cheap, but hear me out.
I’ve been a SAHM (read: six kids and all the craziness that comes with running that crew) for more years than I like to admit. I mean, yes I’ve done a lot of things outside of that role over the years (volunteering with the HOA, the PTA, and BSA… and playing a major support role to the therapy practice my husband owns), and yes, I love my family and have worked hard to create a good life for my kids. But I realized recently that I want more to fill my desire to learn and connect and serve outside of just my family.
So I felt like it would be a logical next step to get a Master’s degree, since I already have a bachelor’s degree but it’s not in a field I want to pursue. Then as I explored options (statistics? data science? software engineering?) I learned about cybersecurity as a field and immediately knew: that’s what I want to do. But as I did my research, I was recommended to wait on a master’s degree for various reasons, and to pursue certifications instead. I’m sure either path would be fine, but certifications cost significantly less than a MS.
Lots of self-study for the CompTIA certs was great, and those certs were relatively inexpensive, but I wanted some kind of class. Something with people. Interaction. Enter SANS. Lots of content, a teacher, interaction, labs, and certification at the end. I decided to make the investment and feel that to me it was worth it.
I took SANS SEC401 (Security Essentials). I had really hoped to attend in person, but alas covid, so live online is what I got. They did a great job with the delivery, but I did miss the networking and comradery that could have been better in person.
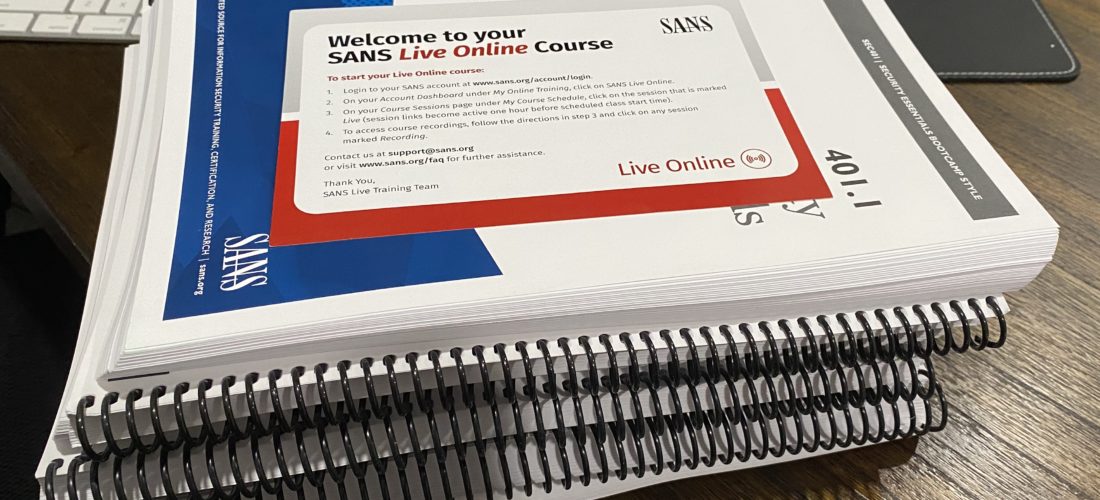
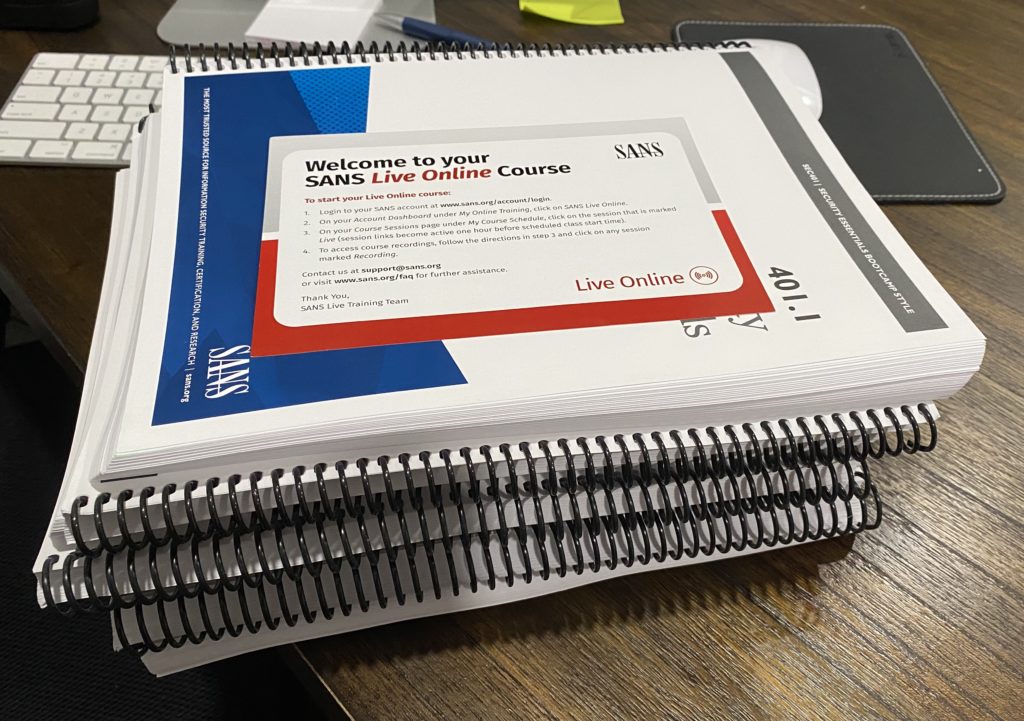
The course materials arrived about a week before the class, and those books were a little intimidating! Six course books and a lab book, each about 300 pages long. I also downloaded the course content a few days before the class, which I’d definitely recommend since it takes a while to download even on a strong connection.
the short stack
Most people could probably have a great experience with this class at home, but as I was thinking through how that would go for me (the class was in a time zone two hours behind ours, and my house and kids tend to get very loud in the evening hours…) I decided that with as much as I was investing financially in the class, it would be better for me to find a way to make sure I could focus without distraction and without my normal day-to-day distractions (read: children, dinner, cleaning, work), so I flew to my parents’ empty house in San Francisco (they were taking their first post-covid trip) and it was the perfect venue for the class!
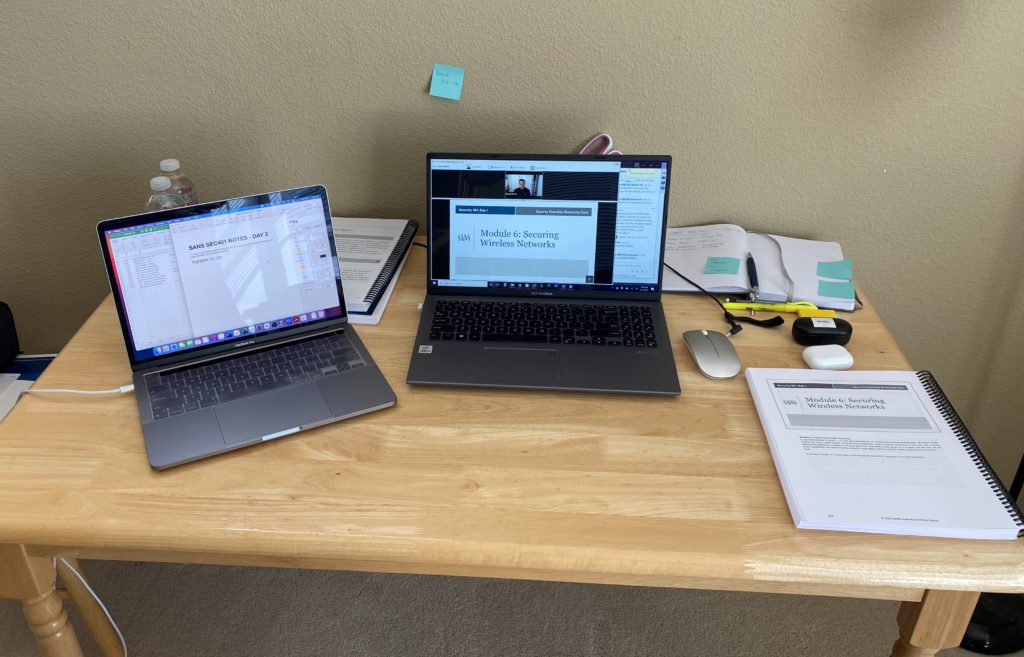
Now for my setup for the class. With live online, there’s a GoToMeeting for the class video, Slack for discussion, and VMs for the labs.
I used two computers: my MacBook for taking notes (I used Pages, then copied my notes into OneNote when I was finished so I’d have a backup), and my Windows laptop for the GoToMeeting, Slack, and the VMs. (I also had OneNote open on the Windows machine… when I occasionally took a screenshot I just dropped it into OneNote so it would be easy to add it to my notes on the MacBook.) I also pulled up the pdf course books on the MacBook, but found it was simpler to use the paper books.
My dad had this table set up for working from home, and it worked great as a home base for me as well.
The class itself was intense. 9am – 6pm for 6 days, with a 5 minute break every hour and a 45 minute break for lunch. Add a few more hours if you do the NetWars along with the class (for this one it was Thursday and Friday evening)–which I’d definitely recommend. I also learned that in 5 minutes you can’t do nearly as much as you might think!
The course content was great, which you can read about on the SANS website. I did put all the content from the course on a flash drive–including the digital course books, VMs, audio files, and my notes–so I can keep it as an archive in case I want to reference something from it after the download access expires.
Things that helped me throughout the week: drinking lots of water, some Dr Pepper for the afternoon lull (I know, so healthy); DoorDash (I think I used them twice, one on a NetWars day when I didn’t want to take a break to make something to eat for dinner); pre-prepared meals and snacks (thanks, Costco); and fresh air (seriously, take a walk at some point every day to clear your head).
I guess my big takeaway is this: if you can afford it, a SANS class is a great way to learn a lot of content in a short amount of time. If you can’t afford it, I’m sure you could get a lot of the information through free or inexpensive resources. The difference is the large amount of reliable information delivered in a neat little package. If you can get your employer to pay for SANS training, even better!
Now I’m ready to go through the course material again as I build an index to prepare for the GSEC Exam. But the exam prep deserves its own post!
I passed the Security+ exam yesterday! My hard goal was to finish before the SY0-501 exam version is retired this summer, but secretly I hoped to finish in March or April. Well, life got in the way of my March or April dreams, but I met my true goal so I’m definitely happy about it.
The resource that helped me the most was CompTIA Security+ Get Certified Get Ahead: SY0-501 Study Guide by Darril Gibson. For A+ and Network+ I used the books as a resource to clarify concepts I didn’t feel like I understood fully from the videos, but when I started with the videos for Security+ I felt like I wanted a little more meat. So I picked up the book and started reading, which turned out to be a great choice. My strategy was to read each chapter, taking care to make sure I understood the concepts, highlight the main points in the chapter summary, then go through the practice questions at the end of each chapter. If there were questions I got wrong, I would figure out the correct answer and make sure I understood before moving on.
Once I finished the book I took the practice exams that came with the book, along with Professor Messer’s practice exam book, making sure to review each question that I missed to understand the concepts in them.
Last but not least, a review of the CompTIA exam objectives – this is a must for any CompTIA exam, they’re so detailed! I like to go through and check off each concept I feel comfortable with in green, marking in orange each concept I think would be helpful to review, and marking in red the things I really just didn’t know. (Markup on the iPad is great for this.) Then I reviewed all the orange and red concepts before the exam.
Honestly, it didn’t feel as difficult as I expected. I did have six performance-based questions, which surprised me because usually there are no more than five, so I got a little nervous when I clicked next after the fifth one and the next question wasn’t multiple choice. As I moved through the multiple choice questions I thought, I think I’m getting these answers, but maybe they’re trick questions? But finally I got to the end and was pleased with my score. (Yes, I know a pass is a pass but I’m an overachiever so I still like to see how high of a score I can get.)
The In-N-Out by the testing center has become my go-to celebratory post-exam lunch!
If you download a Linux distribution or an executable file, you may see a recommendation to verify the checksum before running or installing your file. I have to be honest, the first few times I saw this recommendation it was something I didn’t understand, so I completely blew it off. (Shhh…)
In my defense, I was probably downloading Linux or VirtualBox and just wanted to get through the install to whatever task I was trying to learn at the time. I know, not much of a defense…
When I had seen it enough times to recognize that it was legit something I should do, I finally decided to learn what it was and how to do it. I was pleasantly surprised by how easy it is! And now I can feel more secure in knowing the files I’m downloading are complete and actually what I expected to download.
So what is a checksum, anyway? It’s a string (a sequence of letters and numbers) that is generated by using a cryptographic hashing algorithm on a file. Checksums are used to check data for errors. If you know the checksum of the original file, you can find the checksum on your file and compare it to the original to confirm that they are identical.
(You can read more about checksums here and here.)
How to Verify a Checksum:
The method I’m going to describe to verify a checksum uses the Terminal on a Mac or in Linux, or Command Prompt in Windows. There are a few other ways, but I like this one because it’s quick and dirty. If you’re not familiar with using the terminal or command prompt, here’s a quick video with Terminal basics, and here’s one on how to use the Command Prompt. (Because MacOS is based on Unix, Mac and Linux are very similar… so anything I describe on a Mac will be virtually identical in Linux.)
First, locate the checksum of the original file and determine its type. The main options here are SHA-512, SHA-256, SHA-1 and MD5. Each of these uses a different hashing algorithm to generate the checksum. If the site where you are downloading the file lists checksum values, it will also list the type.
Next, note the full path to your downloaded file. For example, if it’s in your Downloads folder on a Mac, your full path might be /Users/Username/Downloads/filename.extension or if it’s in your Download folder in Windows your full path might be C:\Users\Username\Downloads\filename.extension. (On a Mac, ~ signifies /Users/Username, so the path might be ~/Downloads/filename.extension.)
Now you can open up your Terminal or Command Prompt. I’m going to walk you through step by step for the SHA-256 checksum on a file in Terminal, but the method is the same for all checksum types on a Mac or a Windows computer. All applicable commands are listed below this example. (For my example, I’m using a file downloaded from https://www.osboxes.org/ubuntu/ where they have the checksum listed on the site right next to the download link.)
Type the following command at the prompt in your Terminal Window:
shasum -a 256 /full/path/file.extension
Example:
shasum -a 256 /Users/stevie/Downloads/64bit.7z
It might take some time (when I was working out this example it took about 30 seconds), but the checksum will appear in your terminal, followed by the filename.
I like to use the Diffchecker utility to check the difference between the hash listed on the download site and the hash generated on my machine. You paste the original file’s checksum into the first box and your downloaded file’s checksum in the second box, and the utility will tell you whether or not they are identical.
Here is a full list of the specific commands for each type of hash on Windows and Mac/Linux.
These are my favorite challenges and experiences of this challenge:
Linux Primer
I love the linux command line. It’s fun. Not to mention if my kids walk through the room and see me in linux they’re always like, “Mom’s hacking again!” which of course makes me laugh, and also makes me feel like a pretty cool mom.
The lights and the vending machine in the UnPreparedness Room
I enjoy cryptography, even though I haven’t done much of it yet. It’s probably my math background, I have taken a lot of math classes and really enjoy math. And the problem solving involved in these was just fun!
Soundtrack
Have I mentioned I loved the soundtrack for this challenge? My favorite song though was Ninjula’s You’re a maen one, Mr Grinch. So much energy!
I’m fascinated by the idea that through a little device you can manipulate id cards. The Proxmark3 seems like an awesome tool. This HID/ProxCard Cheat Sheet could come in handy some day.
Scapy
Really any specific way to change a packet is new and fascinating to me! I knew it was possible but to see it in action was pretty cool.
Things in this challenge that were mostly or completely new to me
S3 Buckets
I don’t know a whole lot about how Amazon Web Services works. I’ve just started learning about EC2 instances, but haven’t gotten very far yet. I love learning about how everything works together in the cloud and look forward to learning more about S3 storage buckets and ways to secure them.
Tmux
The idea of multiple terminal sessions being accessible in one window kind of blows my mind, not gonna lie.
Regex
Regular Expressions is a concept I’ve come across before but never in this much detail. I actually was working on a script the other day where I ended up using regex and it was so helpful! I still am a baby when it comes to using it, but I learned a lot through the process in this challenge!
Redis
I still feel unsure of what exactly redis is used for, but at least now I’ve had a little exposure to build on next time I come across it!
Lookup Tables
I have to say I’m proud that my natural way to fix the vending machine was basically a lookup table. I’ll have to look into methods for lookup tables in more detail next time I come across a polyalphabetic cipher. I’m sure there was a way to automate this, or at least I’d like to think python could have saved a lot of time here, I just don’t know enough about it yet to make it happen!
Things I learned about hacks and challenges during this challenge
Taking Notes
I took notes right from the start, but as I progressed through the challenges I realized my note taking was definitely lacking. I tweaked my notes along the way, but still as I wrote this up I found there was so much missing from my notes and had to revisit the challenge and walk through it quite a bit a second time to get the details I missed. In the end, here are the things I learned about taking notes:
Take all the screenshots. I took quite a few screenshots along the way, but I wished I had taken more… or differently. What I would change for next time? Take a screenshot of the full badge at the beginning. Take a screenshot of each room before interacting with it.
Track the dialogue better. I started just making notes of the gist of what the elves said. Then I realized their specific words were probably more important, so I started typing their comments word for word, but quickly decided there had to be a better way. After looking through a little more closely, I realized their dialogue was in the chat window! Wish I had paid attention to that from the start. Copy and paste is so much easier than copy typing!
Take notes in a way that will support a write-up. This write-up took forever because I didn’t do a great job of typing up all my thoughts along the way. Most of my notes were in the form of screenshot or short phrases, which was good but I definitely could have done better.
Stop and Smell the Roses
I have a feeling I missed a lot. I was so focused on the specific objectives and didn’t notice as much as I could have about the environment, the narrative, storyline, etc. I heard people mention a few Easter Eggs and man I want to see what I was missing!
I guess what I’m trying to say is I learned that challenges like this are more than just about the objectives. They can be so much fun too!
I’ve wanted to set up my own Network Attached Storage for quite a while now. Well, I found a sweet deal on this 5-bay NAS on Prime Day on October, and I finally sat down and got it up and running this week!
I put two 4T WD Red drives in it (also on sale Prime Day!), and put a price watch on those drives in camelcamelcamel so I can hopefully fill the other 3 bays over the next year or so.
Here’s what I’ve learned so far:
It was actually really easy to set up. I put the drives into the bays, plugged it into my network and the wall. Then I installed the management software on my iMac and stepped through the drive setup. I want to say that within 30 minutes it was ready to go.
I know very little about servers.
Things that I hear about that sound intimidating (Docker anyone?) are usually not that hard once you get into it.
Google is my best friend. (OK, I knew that one already!)
The one thing it did without asking me was set up the drives on a RAID array with RAID 1. I wasn’t planning on doing it that way, but I’m going to leave it for now. I think once I add a couple more drives I’ll rebuild the array using a higher RAID… I feel like for my purposes mirroring the data isn’t the best use of drive space.
Here’s what I have installed on it so far. Of course I started by looking for an anti-malware, and Clam Antivirus is the one recommended by the OS so I figured I’ll try that out. (It’s part of Cisco so right away I feel like it’ll probably be good!) And right off the bat I knew I wanted to set up a VPN server (there was one by Terramaster ready to install), and learn a little more about Docker. I also set up a Plex server to see what that’s all about (not sure if we’ll actually use it or if I’ll end up taking that one down in the end).
Oh, and I set up an Apache Guacamole instance in Docker but don’t have any machines to connect it to yet–guess that should go on my project list!
For real though. KringleCon3 and the Holiday Hack Challenge, I can’t even tell you how awesome. It’s the perfect combination of geeking out, having fun, listening to a great soundtrack, watching short talks to give me tips, stalking discord, taking notes, and learning by doing.
I didn’t get a chance to start on this until later in December, but it’s been SO much fun and I’ve gotten a little over halfway through so far. (Still a few more days before I need to stop and write it all up…)
And it looks like they do it every year, so it’s definitely going on my calendar for every December because I’ve loved it so much.
It’s on my list to look at the write-ups from last year too. I’m new to the write-up thing so it will be such a good resource!
Time to complete the trifecta! I started studying for this one as soon as the holidays were over, and I’m excited to really dig in. Here’s are the resources I’m planning on using:
Professor Messer and Jason Dion both have great material, and in my opinion they complement each other well. I like the depth that Professor Messer goes into, and how closely his videos follow the course objectives. And I like how simply Jason Dion explains the concepts. My strategy for this one will be to listen to the Udemy videos in the car or other times when I want something to listen to, and watch Professor Messer’s videos at the computer while taking notes (because I’m very much a visual learner and taking notes helps my comprehension a ton).